

Let's prepare a vapor barrier and learn why it can be critical in order to install metallic and epoxy floors correctly.
Stick around, and I'll walk you through the essentials for achieving that pro-level finish on your next flooring project in this video https://youtu.be/A8tokpGiZ5k
The Importance of Vapor Barriers
Have you ever admired a sleek, shiny floor in a hangar or a stylish showroom and wondered about the secret behind its flawless finish? Let me introduce you to the unsung hero of many flooring projects – the vapor barrier.

Vapor barriers are the shield that protects your floor from the invisible nemesis – moisture and gases that sneak through porous concrete. Without this protection, you run the risk of bubbles forming beneath your floor.
These bubbles not only disrupt the smooth finish but may also turn into unsightly potholes upon curing and drying.
Consider vapor barriers as a robust armor, holding back an impressive 20 pounds per square inch of pressure from gases and moisture alike. It's a step you definitely shouldn't skip if you're aiming for a floor that's as durable as it is attractive.
Prepping the Floor: Clean, Fill, Repeat
First things first, let's get that floor ready for its transformation. Here's how it goes:
-
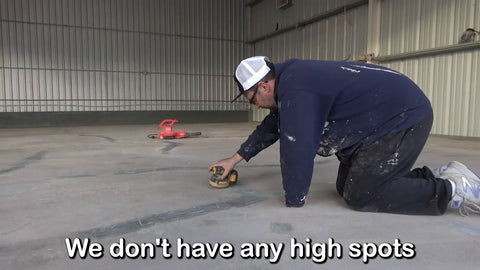
Cleaning is a no-brainer, especially in dusty areas like airport hangars. A thorough blowout removes as much dirt and dust as possible.
-
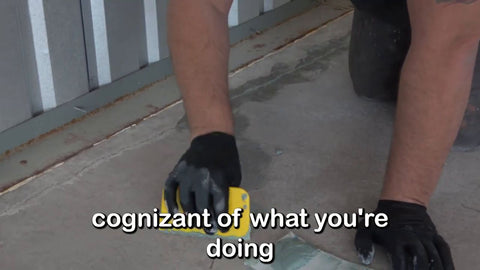
The next important step is filling any cracks and divots. Believe it or not, our go-to material is body filler – yes, the same kind used in car body repairs! It's budget-friendly, works marvelously, and best of all, it cures quickly so you can keep moving forward with no delay.
-
I recommend using a bondo spreader and a precise technique – press down to fill the crack, then skim off the excess. This prevents unnecessary sanding later on.

Applying the Vapor Barrier: Strategy is Key
Alright, onto the central part of today's tutorial – the vapor barrier application process. We're using a top-notch product that covers about 500 square feet per kit. Here are some pro tips when working with vapor barriers:
-
Divide and Conquer: Use tape to mark out sections on the floor to manage your workflow.
-
Measure Twice, Pour Once: Ensure you mix up only as much as you can spread quickly. Small batches are your friend if you're working solo.
-
Patience Pays Off: Rushing might feel like saving time, but it often leads to do-overs. Take your time.
Mixing the Magic Potion
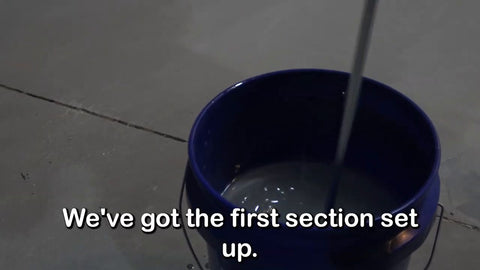
When it comes to mixing your two-part A, one-part B vapor barrier, precision is key. A minute or two of thorough mixing is essential – you want a homogenous mix without air pockets for the best finish.
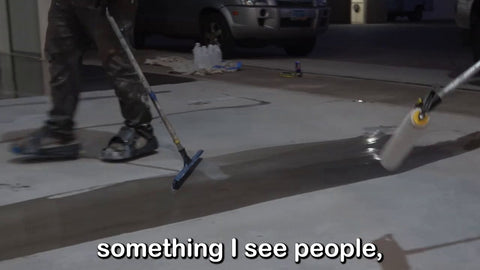
The Pour and Spread
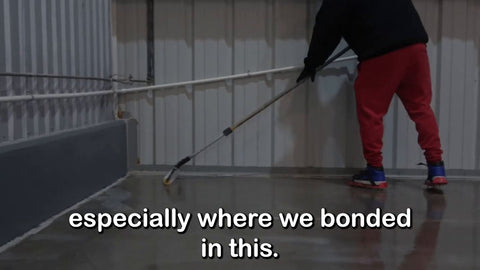
Once mixed, we pour the material in parallel lines across the pre-segmented floor section. The next weapons of choice are a squeegee and an 18-inch roller.
The goal is to spread the barrier thinly and evenly, first with the squeegee and then cross-rolling with the roller to ensure we don't miss a spot.
Pro-tip for a Perfect Spread
Overlap slightly between sections; don't stop abruptly at the dividing line. This will help you avoid creating visible lines on the floor.
A Quick Hack for a "Polished Concrete" Look
If time or resources don't allow for a full polished concrete process, the vapor barrier can be your quick fix. Apply it post-grinding for that glossy, durable finish – a cheater's version of the polished concrete that still looks fantastic.
Vapor Barrier Application is Finished
After finishing the vapor barrier application, what remains is a smooth canvas ready for the next steps in your flooring project, be it adding color or laying down a clear coat.

Keep up with us for more handy tips and tricks, and remember, every time you rush a project, you're just setting up another one for the future.
Here's to a flawless floor on your next project!
Stay tuned for more epoxy resin guides and be sure to check out our other blog posts for more tips and tricks.
👉👉 Comment "Epoxy Resin Tutorial" Below if this was helpful to you and you want to see more.
ps... we are selecting winners for the upcoming giveaways by reviewing the best comments on our blogs and youtube channel. - hint hint


4 comments
Martha M Bryce
Epoxy resin tutorial. You’re an excellent teacher! I’m an artist who uses resin but I enjoy all these applications and if I ever have a chance to do my studio floor, this is it!
robert c.
follow the steps, I found a small 6" drywall trowel works great for the body filler process, but as with any body paint process time patience and prep are key to a fantastic looking piece of art…
Zack
Epoxy Resin Tutorial
Janet Hicks
Helpful information, thank you