

Hey there, craft enthusiasts and DIY aficionados! Rich here from The Epoxy Resin Store. Today, I'm excited to guide you through the fun process of making your very own homemade epoxy resin coasters. With a bit of creativity and a dash of patience, you'll be well on your way to creating coasters that'll not only impress your friends but also add a personal touch to your decor. So, roll up your sleeves and let's dive into this crafty adventure!
Follow our guide and create Your Own Epoxy Resin Coasters in this DIY Project Video.
https://youtu.be/layCCQLdCMQ?si=Uv5WyUDQVf0KeoQD
Gathering Your Supplies
Before we get into the nitty-gritty of coaster creation, let's talk about what you'll need. Here's a quick checklist:
-
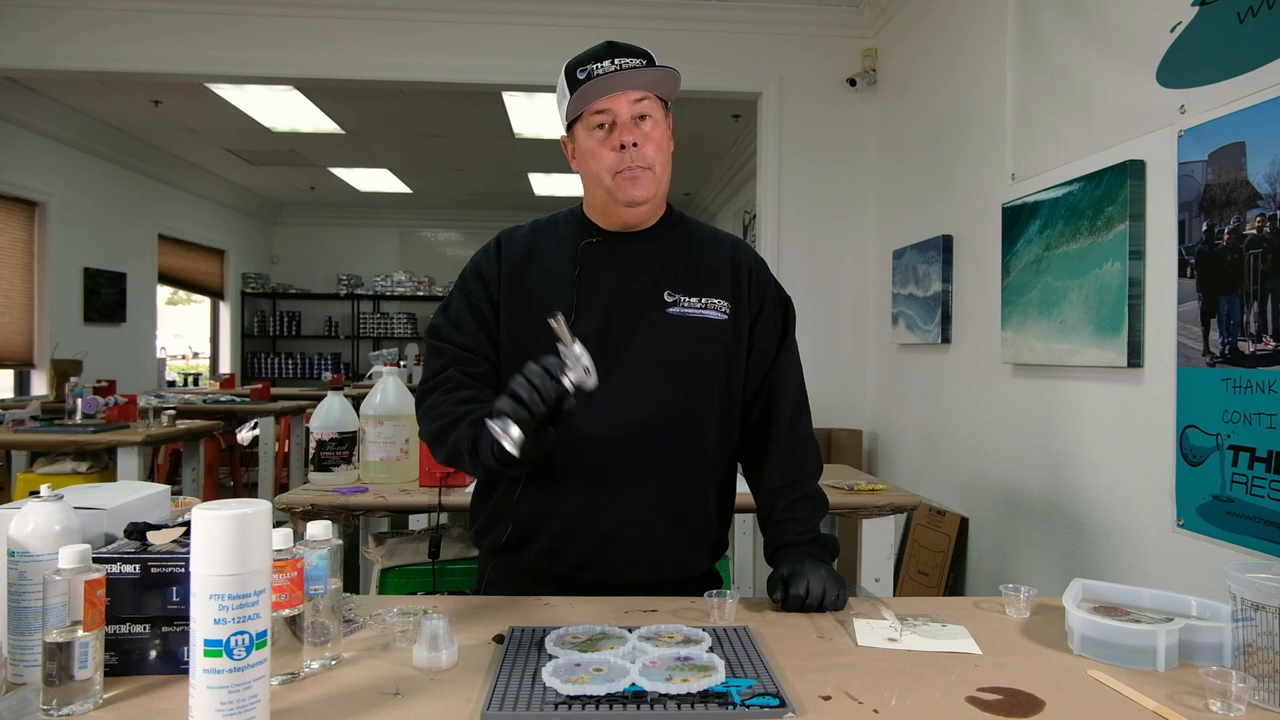
Handheld torch (for bubble removal)
-
Dry flowers (included in the kit we offer)
-
Disposable gloves (safety first, folks!)
Remember, preparation is key, so having everything within arm's reach will make your coaster-making experience a breeze.
Setting Up Your Workspace
First things first, let's start with prepping our molds using mold release spray. This step is crucial as it ensures your hard work doesn't permanently bond to the mold, making it easier to pop out your beautiful coasters once they're cured. Just give the interiors of the molds a light spritz and you're good to go.
Now, onto the highlight of these coasters – the flowers. When using flowers in resin projects, it's essential to ensure they're dry. Moisture is a big no-no here, as it can lead to unwanted cloudiness or even spoilage within the resin. If you're using our handy dandy coaster kit, you'd be happy to know that we've included a selection of about 20 to 25 vibrant, dried flowers that'll add life to your coasters.
The Art of Mixing Epoxy Resin
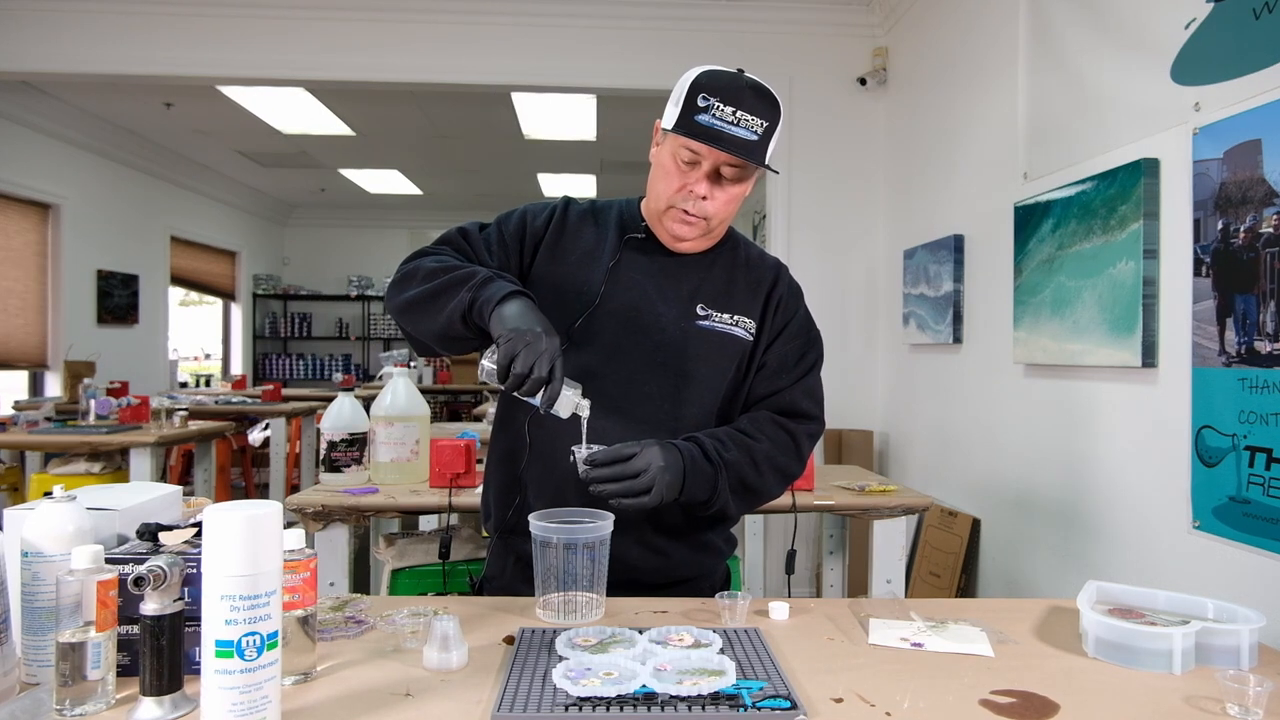
Next up, the epoxy. The perfect mix ratio for our epoxy is a simple one to one by volume. Trust me – precision matters, but there's no need for a chemistry degree here. Fill up your mixing cups with equal parts of parts A and B, then combine them into a larger container for the main event – stirring.
Pro tip: Always add the less viscous Part B first, as it makes mixing smoother and more efficient.
When stirring, imagine yourself a maestro conducting a symphony – not too fierce, not too meek. You're aiming for clarity in the mixture, achieving a perfect blend free of cloudiness or striations. A good two minutes of mixing should do the trick.
Pouring and Setting the Stage
Ready to pour? The real fun begins now. With everything prepared, gently pour the epoxy over the flower-laden molds. The goal is to prevent the flowers from floating away while ensuring the epoxy settles nicely around them.
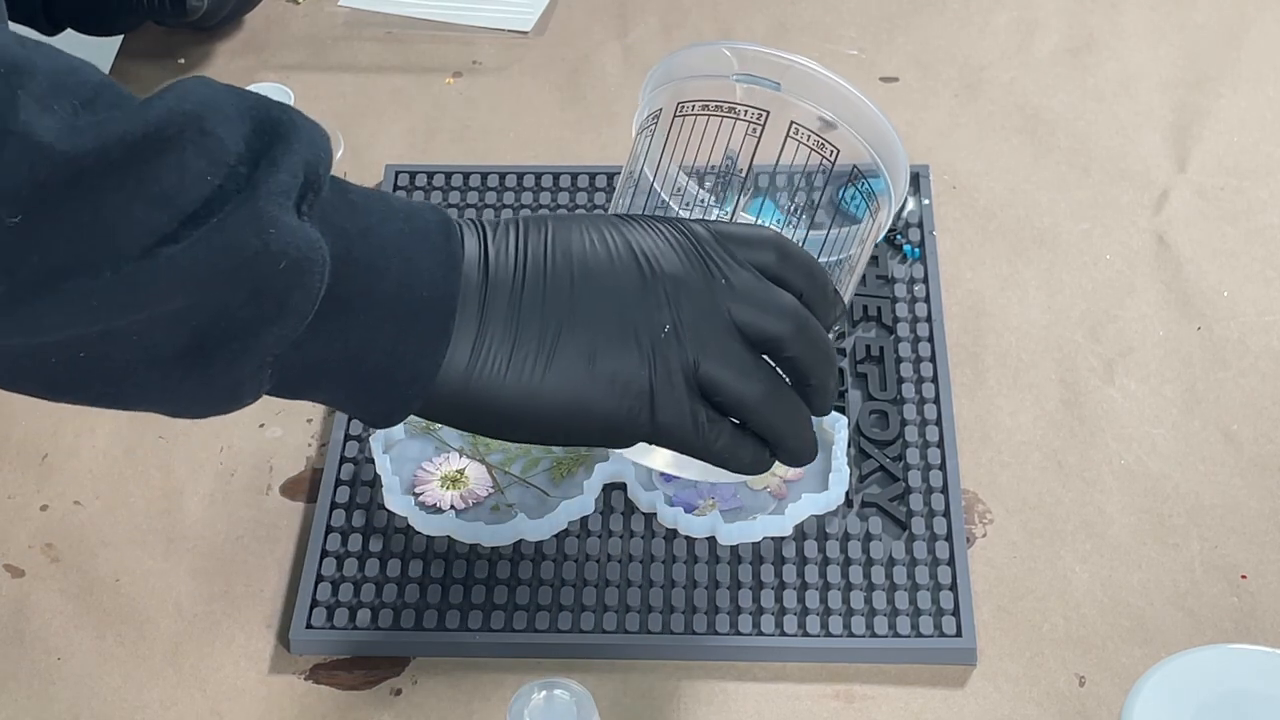
A word of advice – pour slowly and methodically to avoid trapping air bubbles beneath the surface.
Bubble, Bubble, Toil and Trouble
Ah, the bubbles. Pesky little things, aren't they? Fear not, for that's where our little handheld torch comes in. Just sweep it gently over the surface – not too close, now – and watch the stubborn bubbles bid their farewell. Do this a couple of times with intervals to ensure a glass-smooth finish.
Remember, patience is paramount. Epoxy takes time to cure, and factors like temperature can speed up or slow down the process. So, let your coasters rest for a good 24 hours before demolding.
The Big Reveal
After all that waiting, the moment of truth is finally here. If everything went according to plan, you'll be greeted by a set of stunning, homemade coasters adorned with the beauty of flowers frozen in time.
"Whether you're a seasoned DIYer or a beginner looking to get your hands dirty, making resin coasters is an enjoyable and rewarding endeavor that results in one-of-a-kind home accessories or heartfelt gifts." – The Epoxy Resin Store
And there you have it – an end-to-end guide to crafting epoxy resin coasters, courtesy of yours truly at the Epoxy Resin Store. If you're itching to try this out for yourself or need supplies, swing by our website at theepoxyresinstore.com – we've got everything you need.
Thanks for sticking with me, and here's to achieving those creative goals with a sprinkle of fun and a spirit of DIY. Catch you on the crafting flip side!
Stay tuned for more epoxy resin guides and be sure to check out our other blog posts for more tips and tricks.
Comment "Epoxy Resin Tutorial" Below if this was helpful to you and you want to see more.


13 comments
Cynthia Thompson
Very informative class! Thanks for sharing your wisdom, advises, etc!
Mary Shields
DONE
Justan Jenkins
Epoxy Resin Tutorial. love this, I’d love to try this some day, lots of ideas but too little money…
Hope Greenjack
Thanks for sharing!
Cherry Wiedle-Stewart
Done
Tonia Scheier
DONE!
April Dunn
Epoxy Resin Tutorial
Martina VanHoy
Epoxy Resin Tutorial. I love your products that I have been able to try!
Tanya
I’m new to epoxy resin so really appreciate your tutorials. Thank you.
Chris Speegle
Epoxy Resin Tutorial
Linda Ulrich
Great video on dried flower coasters!
Debbie marruffo
I love epoxy I have made so many things from jewelry to a water fountain fish coffee table. I would like to buy in bulk though.
Jorge
Epoxy Resin Tutorial