

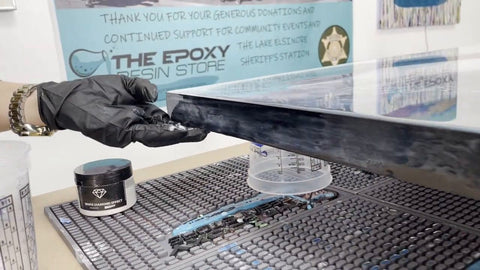
Step-by-Step Guide with Melissa Renee creating a Seascape with Epoxy Resin.
Join Melissa Renee 🎨 from Fiery For Deep Blue! 💫 for a detailed walkthrough on crafting a stunning ocean Seascape painting using epoxy resin. Hosted at the Epoxy Resin Store, this tutorial covers all you need to know to start your resin art project.
Products used in this video:
- Epoxy Resin (Platinum Clear)
- Powder Pigments (Black Diamond)
- Measuring Cups and Gloves
Choosing Your Canvas: Why Wood?
Here's why a wood panel is preferred over canvas for resin artwork.
As a resin artist, I've developed a fondness for wood panels over traditional canvases. They’re not just robust but provide the perfect support for the weight of the resin, ensuring your artwork remains pristine and warp-free.

Plus, a primed wood panel spray-painted with flat black acts as a vibrant stage for your pigments to shine. Sure, you could opt for white, but I find that a black base amplifies the colors.
But, of course, the beauty of art is in its diversity—feel free to play around with different hues to find your signature style.he Arsenal of Artistry
My go-to for the whitest whites in ocean crests is an epoxy paste from Just Resin, a superb product from Australia crafted explicitly for use within resin.
Accompanying this star of the show are the shimmering black diamond mica powders—these little gems add a captivating depth to your seascape and are available right at the Epoxy Resin Store. We'll take a closer peek at these beauties soon.
When I create, be it a serene seascape or a wild abstract, I love to introduce a symphony of hues. Limiting to one or two feels too constrained for my taste.
Today, our palette consists of five mesmerizing shades: white for the foam, deep sea blue, bora bora, blue diamond, Caribbean blue, and a touch of white diamond effect for that iridescent charm.
The Backbone of Resin Art - Premium Clear Epoxy
Crafting with resin is nothing short of a science blended with the freedom of art. For a smooth experience, we turn to premium clear epoxy, with its simple one-to-one ratio mix—an ever-reliable choice.
You get a generous window of 35 to 45 minutes of work time, but here's my tip: choose your colors first, then mix your resin. Trust me, it saves precious moments.
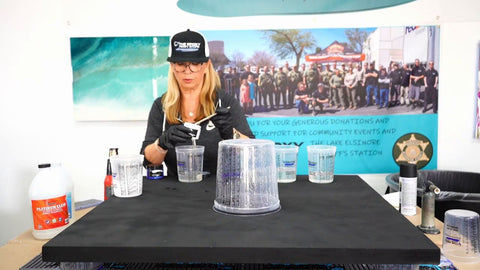
When you're gearing up to mix, pick a large container marked in ounces—we're about precision here. We’re looking at 48oz for our 36 x 36 panel, just to give us a safe margin.
Always introduce the hardener (part B) before the resin (part A) and stir with intention, not haste. Avoid a poor cure by stirring thoroughly for about three minutes—this can make or break the final outcome.
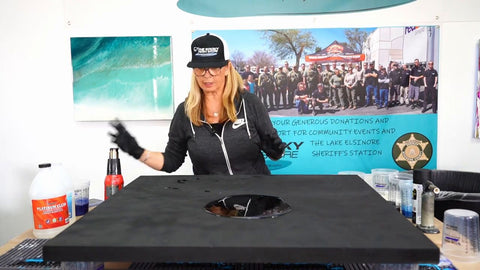
Preparing the Panel: A Resin Artist's Ritual
Before coloring, priming the board is required to lay down the red carpet for your pigments. A thin layer serves as a playground, allowing colors to dance and mingle effortlessly.
And when it comes to messy hands? Double glove! Once the board is primed, just peel off the top layer and voilà—an instant clean slate.
The Dance of Pigments
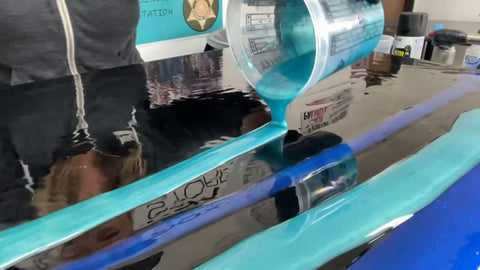
Now, imagine your wood panel as an ocean waiting for its waves. We introduce the pigments, each color making its grand entrance, guided by the warmth of a heat gun.
Not to be mistaken for a hairdryer, the heat gun gently persuades the colors to flow, blend, and create patterns that speak the language of the sea's beauty.
Begin with the deep sea blue, pour, alternate, and let the bora bora ribbon through. Mild moves with the heat gun breathe life into the composition, weaving shades and creating natural gradients. Hold back no imagination here—let your creativity lead.
"Art is not what you see, but what you make others see."—Edgar Degas
As for the whites, they bring the essence of foam and froth. The titanium white epoxy paste packs a punch against the subtle sheen of the white diamond mica, delivering a sparkling serenade of the ocean's playful nature.
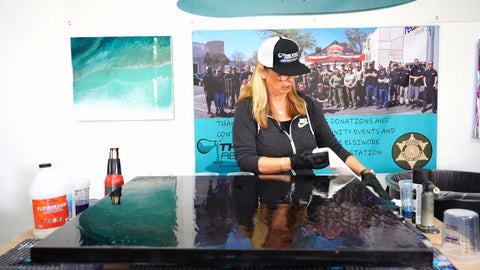
Finishing Touches: Bubble Banishing and Edges
Last but not least, run fingers around the edges for a smooth finish and banish any renegade bubbles with a torch. Maintain a light hand—scorching is not on today’s art menu.
Even now, the concoction of resin and pigments waltzes, creating little cells, undulating patterns testament to the magic of resin painting.
And there you have it, a serene epoxy pour seascape painting, a fragment of the ocean's soul encapsulated on a wooden canvas. It's a dazzling display of what the premium clear epoxy and a dash of creativity can achieve.
I hope this guide has inspired you to take the plunge and put your own spin on resin painting.
Dive in, the resin's just fine! Follow our creator @ Melissa Renee
👉👉 If you liked this video and want to see more
👉👉 Comment "Epoxy Resin Tutorial" because that does two things.
1. It lets us know you like it, and encourages our creators!
2. Commenting gives you a chance to win within one of our upcoming givesaways. -hint-hint
https://www.theepoxyresinstore.com/ is an expert manufacturer of various epoxy resins that can be used for both craft projects and industrial applications. We also offer liquid inks, dyes, pigments, glitter, other additives, and tools for various epoxy resin projects.
The Epoxy Resin Store
support@theepoxyresinstore.com
Phone: (951) 677-0400
Address: 540 Crane St suite A Lake Elsinore, CA 92530
https://www.theepoxyresinstore.com
Social Accounts:
https://www.facebook.com/TheEpoxyResinStore
https://twitter.com/epoxyresinstore
https://www.linkedin.com/company/the-epoxy-resin-store
https://www.youtube.com/channel/UC3NKcCrYL5uHK-sH5XMQ9HA
https://instagram.com/theepoxyresinstore
#epoxy #epoxyresin #theepoxyresinstore


3 comments
Ron
I would like to do a table, can you send a video of that start to finish?
Chrissy
epoxy resin tutorial
JJay
epoxy resin tutorial