

DIY enthusiasts! It’s Bronson here from the Epoxy Resin Store, and I've got something genuinely thrilling to share with you — the magic of Polyaspartic coatings.
If you dread the sight of your pristine white surfaces turning a shade of yellow over time, today's insight into Polyaspartic coatings will be your countertop's new best friend. Follow along in this video https://youtu.be/DfEF6b6eqik
Why Polyaspartic Coatings Deserve Your Attention
Polyaspartic technology offers a solution not just to the aesthetic challenge of discolored surfaces but also boasts exceptional durability.
With its resistance to yellowing, even under constant exposure to sunlight, Polyaspartic coats stand out as a top choice for maintaining the integrity of the surface's original color — perfect for maintaining that brilliant white worktop or any other hue that you wish to preserve in its untouched state over time.
Getting Ready: Prepping and Mixing
- Polyaspartic Resin - Best Epoxy Coating System
- Epoxy Spreading Tool
- Small Hand Paint Brush
Before we begin the transformation, it is essential to have your surface built and primed. The countertop should be ready for the application of the coating.

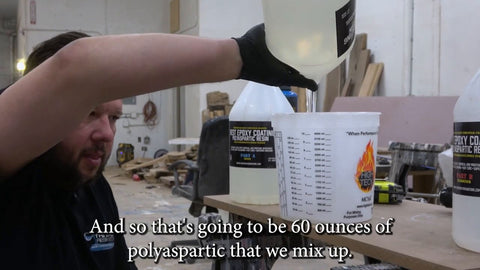
Now, let's talk mixology — no, not cocktails, but something just as meticulous. The Polyaspartic coating you'll fetch from our Epoxy Resin Store follows a 2 to 1 mix ratio. For the math fans out there, if we measure a countertop space at approximately 20 ounces, we'll be whipping up 60 ounces of Polyaspartic in total: that's 40 ounces of Part A to 20 ounces of Part B.
Mixing your coat correctly is not so different from following your grandma's secret cookie recipe – precision leads to perfection.
Once you have your Part A and B ready, mix them slowly with a paddle drill. Remember, no corner of the mixture should feel left out — blend thoroughly, scraping the sides and bottom to ensure an even consistency.
Pouring and Spreading the Polyaspartic
As you apply the mixed Polyaspartic on your countertop, be mindful of the environment. Polyaspartic sets quicker in humid conditions, so while those in drier climates may have up to 45 minutes of working time, an overly humid environment could slash your working window down significantly.
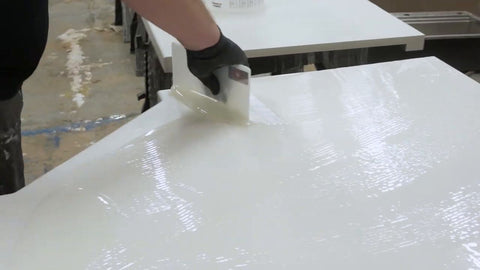
The key to spreading Polyaspartic effectively is in using a notched trowel. Unlike epoxy applications where you might err on the side of generosity, Polyaspartic follows the "thin to win" mantra. Apply just enough product to cover the surface; more is not merrier in this case as excess could lead to unwelcome bubbling.
“With Polyaspartic, it's thin to win - you don't want a ton of extra stuff on there. It'll just slow down the curing process and could cause bubbles.”
Finishing Touches: Adding Design and Removing Bubbles
Transitioning to the aesthetic phase, we add character to the surface. Let’s say the customer has opted for a subtle yet stunning brown marbling. The application is simple — dab and disperse the color, ensuring it cascades down the edges for a continuous effect.
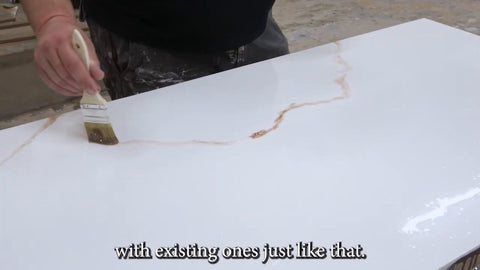
Should you encounter a chip or blemish, do not despair — simply incorporate a vein of color through it, and you gracefully hide it within your design. Aim for a natural, asymmetrical pattern to emulate the randomness of true marble.
And as in all artistic endeavors, step back, observe, and recognize when less is more. Our client, in this case, seeks a delicate touch over a busy tapestry, making the process a study in restraint and finesse.
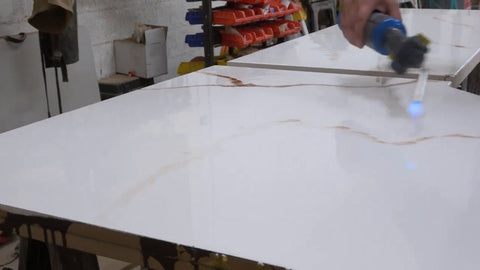
Lastly, eradicate any potential air bubbles that found their way into the mix with a swift pass of a torch. This quick action is crucial for ensuring a smooth, flat surface devoid of imperfections.
Key Takeaways and Safety Tips
Polyaspartic may dance on the same floor as epoxy, but they step to different tunes. Polyaspartic's curing is more sensitive to humidity than temperature, and its application demands an eye for detail and environmental consideration.
Always gear up with protective gloves and a mask — safety never goes out of style. And remember, keep your eyes clear of Polyaspartic — it’s a safety principle not to be taken lightly.

To wrap up, Polyaspartic coatings offer an attractive solution for long-lasting, non-yellowing surfaces. With this DIY tutorial, you're well on your way to mastering the technique for a resilient and vibrant countertop that stands the test of time.
Thank you for tuning in to this deep dive into applying Polyaspartic as a countertop topcoat. While your bank account remains untouched, we'd be more than grateful for your support — give us a like, 👉 subscribe, and ring the bell for more handy DIY tips.
And now, armed with knowledge and ready to tackle the task, may your countertops gleam with the enduring luster of Polyaspartic.
Stay tuned for more epoxy resin guides and be sure to check out our other blog posts for more tips and tricks.


17 comments
Karen Beisler
Epoxy resin tutorial. I want to do this polyaspartic over a granite countertop. I want to know how to prep the granite, what I need to use as a base coat? I also want to know if it’s okay if I use some mineral paints to paint veins on the base coat and then wait for that to dry and apply the polyaspartic over top of that. Please let me know I would appreciate any suggestions.
Bobby Ray
I like what I saw. Can it able used on bare wood. Or would you have to seal it first
Scott Younce
Epoxy Resin Tutorial
Very Very HEPFUL
Scott Younce
Epoxy Resin Tutorial
Very Very HEPFUL
Jaysen Lineberg
Epoxy Resin Tutorial – I’ve used resin for many years including those with UV protectors like HALS. I’m interested in trying polyaspartic for the first time.
Kim Berta Berta
Epoxy resin tutorial
Lewis Agnew
I’m a novice at epoxy, but have never heard of polyaspartic. It was interesting to learn about it.
Joyce
Epoxy resin tutorial
I didn’t know about polyabspartic resin. We are getting ready to replace our cabinets and countertops. Would this work to protect the cabinet doors, too? Of course I mean removing the doors and laying them flat to apply it.
Tina
Wow!! If this works on countertops, will this work on river tables as well??
Looking forward to trying some out!
Stephanie Davis
Epoxy Resin Tutorial
I’m gonna have to try my hand at this.
Tia
Epoxy Resin Tutorial ~ I love this so much and actually have my countertops on to do list!! Thanks for sharing.
Anita Hennessee
Epoxy resin tutorial
Andy Walsh
Hi does this yellow outside due to UVL ?
Martha M Bryce
Epoxy resin tutorial I’d never heard of this but I have a laundry room countertop…
Mark Hohn
Epoxy Resin Tutorial
Mark Hohn
Epoxy Resin Tutorial
JJ
epoxy resin tutorial → I never knew this about polyaspartic. Im going to start testing this out. Thank you for creating this. I didnt know you even had a youtube channl